Wednesday, March 26, 2014

Lifesigns!  

After nearly three years of absence I've finally decided to crawl out of my laziness and begin posting again! I must admit, eerie silence is certainly befitting to a blog named The Blasted Earth- However, I think I much prefer explosive blog posts to the absence of life that comes after. I have to admit, I was impressed when I logged on for the first time in ages and saw that I still had 22 followers! However, I do believe that it may be more the same button-clicking laziness that keeps my own blog roll full of the dead than people counting on my humble little blog. In either case, be you kindred spirits or blogging hopefuls, it's good to have you on board!

Here are some things to expect in the coming week or two:
  • Layout 2.0: TBE is desperately needing a new set-up, drab black with nothing else can become quite a bore!
  • A sign: I'm hoping to requisition one of my artist friends to do a blog symbol to replace the really poor looking Z'Gok capsule toy that is currently on the header. I'm currently thinking that an exploding planet would be fitting.
  • On the Horizon: My first series of theme projects will be on the concept of armies or skirmish forces you can build for just $10-$15. Afterwards, I'll be revisiting old projects and starting brand new ones!
  • Tag 'em and bag 'em: I'm revising my tagging system to be more concise and to make it easier to find specific scales, games, and other geeky things. Also: all prior blog posts before this point will be listed under "Old Stuff"; this is because they primarily won't fit the new blog style (Such as my new and improved picture resolutions! *shudder*). A new era is upon us, however, I don't feel I can give up my relics!
I look forward to having you guys (and gals!) along for the ride. May your laser cannons forever be in your opponents disfavor!
-Dylan

15mm Industrial Humans (Part 1)

Aside from my Lhurrg and Space Demons, I’ve been working on an Industrial World style army of humans. AS well, I plan to have them be able to double as Imperial Guard Proxies if I choose to expand them that way.
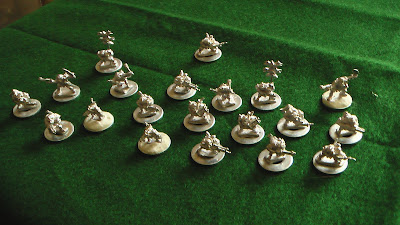
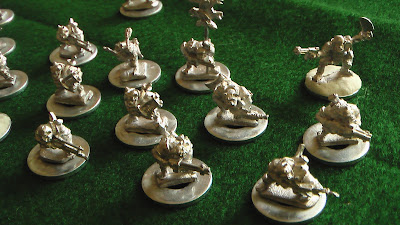
Well, here they are! I went with Rebel Minis Titan Marines. So far I bought the main pack, which comes with 21 minis, and the smaller heavy weapons team packs to augment the squads with. I have enough for around 4 squads plus a small command.
IMGA0349
I’ve so far divided the men into squads of six, five troopers to one heavy weapon man.
IMGA0350

IMGA0351
I wanted a wasteland kind of look, but not a too far gone wasteland. Thus, the green splotches of grass on some of the bases.
IMGA0353

IMGA0352

IMGA0354
Some of them at the start of painting. The middle was actually a free sample figure I got when I ordered, its from their EF Home Gaurd units I believe. Currently, he is the commander until I find a more suitable piece.
IMGA0355
The two one-man sniper teams from the Heavy Weapon set.

IMGA0356
The Prototype paint job, I later decided that I wanted to do a Brick Red and brown based scheme instead.

IMGA0357
IMGA0358
The soldiers, in front of a Proxie Models’ Trencher Tank that will be used for them.

I really like the look these guys started to capture as I painted them. They work well as a retro futuristic expansionists, Soldiers of an Industrial Planet, Imperial Guard from a planet like Armageddon, or a semi-advanced race from military bunkers after a nuclear war. I have yet to finish painting them all and the tanks. I still also want to include some sort of marker to indicate the squad leader; I was thinking some sort of back mounted banner looking like the halfway of a Japanese or a Roman flag.

I am hoping to make the next wave include support weapons, a better command squad, Not-Ogryn, a Not-Commissar, and maybe a few new vehicles.

15mm Trencher Tanks: Beginning

So, I finally got around to ordering one pack of Proxie Models Trencher Tank sets. I have to say, 3 tanks for $10 with only $3 shipping is an amazing deal. Proxie Models is a one man band style set up, where the designer works out of his own barn using a plastic injection machine from the 50’s. Though, the models are great for someone just starting in, and the prices can’t be beat. So far he has another type of tank, terrain, and bases that he produces.
Here are my tanks so far:
IMGA0345
IMGA0346
IMGA0347
IMGA0348

I went crazy and assembled them in under two hours, so sorry, no pictures of the sprues. Though, you can find those in the link above.
These tanks certainly are not snap fit, I had to wiggle the side tracks around until they were even, and then glue them down. Nonetheless, I think that rough and simple models like this are really fun to work with! The casting itself was pretty clean, I only had to file down certain areas to make everything look nice and sharp.
I plan to go with a red and brown color scheme to fit my Industrial Human army, since the rough WWI look of the modals really fit the army well. Some people say this looks like a model from a certain Evil Empire (wink, wink) but I’d say after seeing it in person compared to the other tank, that there are several differences and the Trencher manages to stand on its own feet (Or should I say treads?).

Thursday, June 2, 2011

The Green Tide: Wave 1

Finally! After receiving them a couple of weeks ago from someone on The Miniatures Page, I've finally got some pictures of my current group of Orks/Space Orcs/Spess Urks/What-have-you. (I also got some bonus buildings when I bought them, kudos to CC for being generous)

I have 25 Orks in all currently, 5 in a command and the other 20 in two 10 Ork squads for da' boyz. While not intented to be exactly like Gamed Workshop Orks, I will be using a lot of the same terminology when setting up my force since I love the fluff so much.

I will be using them in Fast and Dirty 4.0 and have already played a test game with them. I'll do a batrep for the next game I play.

'Da Command:
Da' Boss and 'is Orks.
'Dis one luvs da' rokkets!
Da' Mek' Boy and 'is shocka' thingy
'Dis one has Dakka
'Da current Boss. You lissen to 'em, ya lousy grots!
   I loved the pose of the first one so much that I wanted to make good use of it, I figured that a rocket would look great on his back and its fits the pose perfectly. The rocket itself is a chopped down pop-up timer from a Chicken Mignon. I have several more and plan to use them as missiles and rocket packs for a later squad.
   The Mek Boy looked like it was meant to be some sort of power armor originally. I decided to sculpt a nice heavy battery back pack and add a Tesla cannon of sorts. I need to add the coils still but it has shaped up nicely.
   I didn't do much to the heavy gunner in the squad other than shave the horns on the helmet off. The current warboss is a great sculpt, but I plan to sculpt my own much beefier warboss eventually. This current boss will then probably be swapped to the role of commander for a Nob squad.
   Sorry about the lighting in the first picture!

'Da Boyz:
"WAAAAAAAAAAAAAGH!"
"Orks! Orks! Orks!"
I really like how each member of a 10 ork squad had its own sculpt. Especially since each one has so much character! Such a shame that the models are OOP.


'Da rides:
I figured my Orks would be needing to get places, and being my human army has a couple of tanks, I needed something to help shift the balance. The command squad has some anti-tank firepower, but there's only so much one squad can do!

"Look at 'dos beautiful teef!"


This is a WIP of a trukk of sorts. I had originally wanted it to be some sort of transport but it's turned into some sort of support machine as well. I bashed up two old toy cars, a semi and a dump truck, then added plasticard in layers and smaller bits as bolts to make it look proper orky. The cannon is from an old Mechwarrior clix; I want to eventually sculpt a crazy gunner on it. The tubes on the top are going to be smokestacks with cotton "smoke" coming out of it. I'm almost done with it, I just wanted to add more bits here and there detailing it. Alas, I will have to wait until I can get more super glue, this project ate up all I had left!

Lastly I am scratch-building a group of three Killa-Kans! I am working on the first one as a proof of concept for the others. So far I've used a chopped up chap stick for the main body, plus some magic-sculpt. The size is fair currently, the final ratio will be different than GWs average Kan, but it will beef up a bit more as I start paneling and detailing.

Tuesday, May 3, 2011

Giant Robot Support/Alternative Mekanoid Dictator

I was going through my old to bin and I came across a rather impressive toy that I remember playing with 5-7 years ago. Then it struck me by its look it could make an awesome giant support machine, or even a secondary type of the monstrous Dictator (From Khurasans awesome Mekanoid line).
Here it is in all its glory:
IMGA0376
The walker had a few more pieces as well, such as rocket pods that fit between the shoulder and head (You can see the space where they plugged into) and the top to the cockpit.
IMGA0377
IMGA0379
From the look of the cockpit compared to this Rebel Mini’s figure, it looks like it even fits around the 15mm mark!
IMGA0380
Even not as a Mekanoid this has a lot of gaming potential in my eyes. Though, for the life of me I can’t remember the name of the toy or its toy line! All I remember it was based on a show, an American cartoon if memory serves, that had a sort of far future dieselpunk kind of feel. Even the name of the show evades me! I also had a few other toys from the line, such as this really cool red fighter…. But they have been lost to time.
If anyone can identify this I would be very thankful!

Monday, May 2, 2011

The Space Demons Cometh

So, Khurasan Miniatures Space Demons have already caused quite a stir in the 15mm Sci fi community for their excellent craftsmanship and perfect Not-Alien looks. I actually ordered mine a couple of months ago, but didn’t get pictures of my mostly finished force until later. Heck, I was even surprised when I found the pictures I had taken of them while they were still unpainted; I had forgotten I even took those!

Well, here is my force currently:
IMGA0363
It consists of:
  1. 16 Stealth Demons
  2. 8 Hammerhead Demons
  3. 16 Assault Demons
  4. 2 Space Demon Kings
I figured this was a good and sizeable force to start with. My original intention was to just go with enough for 15mm scale guncrawl/spacehulk style gaming, but I later decided I would also get enough for skirmish wargaming as well.

I am currently experimenting with my force layout, trying to think of fits the Space Demons and keeps them from playing like humans. I’m gaming for now with FAD (Fast and Dirty) a free squad based rule system for 15mm Sci-Fi. The Stealth Demons have fallback and deep strike style abilities, with my main goal to make them harassers. The Hammerheads are the only ranged unit of the force, and I have them set to be reserve until they are needed for anti-armor. Then the Assault Demons are linked with the Demon Kings with the Hivemind ability, and are meant to just rush the enemy. Once I work things out I think I’ll post the army list I’m putting together.

The Stealth Demons:
IMGA0365
Assault with King:
IMGA0366
IMGA0367
The Hammerheads:
IMGA0368

Getting and starting the minis: Each “squad” comes with 8 space demons in a little baggy like the below. The flash on them was VERY minimal, and they are some beautiful sculpts.
 IMGA0221
Being that they are soft metal, the tails can actually be bent and twisted a little for differentiation to keep your swarm looking fresh.
IMGA0213
The heads come in the same bag as the bodies, but are unattached. This lets you position them however you would like. They also come in two variants: Ones with the ‘tongue’ and those without.
IMGA0214
IMGA0216
I tend to base all my 15mm minis on metal washers you can get from the local hardware store, using larger ones for weapons teams and Demon Kings.
IMGA0237
Here they are after having been based and had their flash removed:
IMGA0250
And finally with them flocked after adding a little putty to the bases. The flock itself is the coffee ground material described in one of my other posts.
IMGA0264

Final Notes: I LOVE the Space Demon designs not just because I am a huge Aliens fan but also because they have a lot of character as well. You can definitely see the Giger inspiration, but they start to take on a life of their own, different then their xenomorph counterparts; As well, the hammerheads seem to get some inspiration from the flying creatures in the movie Pitch Black.

The sculpts are well defined and they were a joy to paint, especially since they were my first 15mm scale army! Thus I went with something simple and effective, black base with some dark grey, grey, and white drybrushing. I want to eventually go back and work on them some more, and add in more detail.

I plan to eventually expand it with more Assault and Hammerhead Demons, a Queen, and a few more Space Demon Kings so I can try to make variants!

Sunday, May 1, 2011

Cheap Wargaming Terrain:

I’m always looking too find ways to make my gaming cost less; and by cost less I mean find cheaper supplies so I can buy more minis. Terrain is one of those things that you can pour a little, or a lot into and get varied results. I enjoy trying to find the most bang for my buck when it comes to this. It’s sort of a mini game for me, how much can I make with as little money as possible all while still making it look nice?
What’s one way of doing this? Well, let’s look at one thing you might do everyday.
IMGA0242
Yes, what you see above you is a most sacred relic, the coffee pot. Contained within it is the means of producing the holy black liquid that we Americans all crave and desire, Coffee. Joking aside, let’s open it up and see what’s inside.
IMGA0243
There we go, that’s the stuff. After serving it’s purpose coffee grounds are often tossed. Though, a quick google search will reveal lots of interesting (and some quite effective) uses for coffee grounds, such as in here: http://www.thegoodhuman.com/2010/06/08/16-ways-to-reuse-old-coffee-grounds/

But! This is a wargaming blog, and as such we’re hear to read stuff about wargaming! So, it hit me one day as I was about to toss the grounds, if I dried these, they’d make awesome ground cover! We grind our own coffee, so the grounds tend to be nice and small, perfect for basing at smaller scales like 15mm.

The only catch was to dry them. So we have two main sources of doing so: #1 The Sun
IMGA0245
By putting them into a small metal pan and shaking it around so that it’s all distributed evenly, we can let the number one heat source on the planet use its free energy to do our bidding; It’s both primitive and green!  Letting that inner caveman or hippie give a victory cry is optional but encouraged.
You’ll want to use a metal pan here, as it will warm up faster and hotter then say, plastic. You’ll want to occasionally go out and stir or shake it around to make sure all of it dries evenly. Though, this option won’t work in some weather, such as rainy or snowy seasons. Which brings us to our second main option: The Stove
IMGA0248
The bonus of the stove is that you can dry it effectively no matter what the temperature or weather outside is. Though it won’t be ‘free’ like the Sun is, so console your inner hippie and move on. While it will use up a little bit of resources, using the stove will usually be much faster unless you live in a hot, dry climate. Even so you want to make sure you open it up and stir it around so that everything dries evenly. You’ll want to make sure that it isn’t burning either. I haven’t really experimented much with temperature, so just keep an eye open and find what works best for you.
After they are done, I'’ll stick them into a sealed container to keep them safe (and preferably not spilled all over my floor or desk). As a last note, remember that coffee grounds are organic, so if they aren’t dried right mold will take to them and that could get nasty (and bad for your health.
The grounds are good for rough dirt, light gravel, and other such wasteland terrain. Try mixing different grounds together, or with sand for some differing terrain types. I generally glue them onto a base or piece of terrain, then seal with a black primer before I paint. So far it’s working ok!
Enjoy!
IMGA0259